Showing posts with label fireplace. Show all posts

Treasure Box Wednesday: the Road Less Traveled

In Sunday's post, we talked about how the Victorian look isn't particularly popular right now, so those of us who love romantic decorating can find some pretty amazing things at thrift stores.

This post will explain where some of that idea came from.

Saturday's thrifting was a late start for me, as I'd met my buddy Scoobie in the Strip District of Pittsburgh (no stripping involved!) for lunch and some wholesale food shopping.

I had thought, given I was hitting the stores in the late afternoon instead of mid-morning, that the thrifts would be as picked clean as road kill in vulture territory.

I have no problem admitting I was wrong.

The first thing I spied at the Red White and Blue thrift store was this small, deep Victorian pickle dish...
Made in Austria and partially handpainted, I had a hard time believing this was just sitting on the shelf with the bakeware and serving bowls, and not nestled somewhere safe on the shelves behind the counter.

Guess our scantily clad nymph was a bit much for the locals...

Anyway, it was a surprise find, and needed to be rescued.

Heading down to the second level of the store, that's when I came across this large alabaster table lamp...

Ones at 2/3s the size of this go for around $100 at antique malls, and here I found this much larger one-- in pearlescently beautiful condition-- in a thrift store. It was the second find to blow the mind just a bit. It was 3:30 in the afternoon. How could it still be there waiting for me?

And then was my "inkling" find at the Goodwill. By now it was about 5:30 in the evening and I was heading home. A shelf of planters revealed this pretty leaf planter which I had a very good feeling about...
It reminded me strongly of two McCoy pieces I have-- taller ones, but a similar glaze, similar style and color. It wasn't marked on the bottom, but at $1.99 I didn't really care whether it was or wasn't McCoy, because I thought it would look terrific with the other two.

I had a sneaking suspicion, though...
Here you can see it with its buddies.

Upon going home, I sat in my favorite chair and reveled in my good fortune. And then I pulled out my McCoy collector's book. Boy, it never hurts to have good reference books for the things you collect!-- And I was rewarded. The unmarked vase was, absolutely, the real McCoy.

Right now it sits on my mantle, looking very much at home with its cousins. Yee-haw!

Oh, and lastly-- just because I'm finally feeling happy about it (largely because the hard work is done), I wanted to show you all the finished mantle in my one spare room...
All the bits of plaster and grouting and the newspapers and painter's tape (and frustrations) have been wiped away, leaving me with a lovely, calm and quite French sitting room. The cute little blue lamps on the mantle came from the L&L Fleatique in Adamsburg/Jeannette, and the mantle mirror was an Ebay find-- it's a new piece, not an antique, but I think it tops everything off pretty nicely. I'd wanted something that was already painted so I wasn't defacing any antique pieces.

Well, that wraps it up for this Treasure Box! So, here's hoping as you choose your path in your treasure hunting travels, you uncover the things no one else wants-- but which you absolutely love.

Sometimes being eccentric has its benefits!

And maybe I'll see you folks on Sunday. That is, if you aren't out scouting for buried treasure.

Fireplace Fun: Part Two

When last we left the Great Fireplace Installation of 2009, most of the wooden trim had been attached, and the fireplace was getting an extra coat of paint...

Little did I know the unexpected challenges I would face!

The first one, was the molding which went around the frame itself. Even though the fireplace frame was built to its largest size, the top molding that came with it for some reason was still many inches too large to fit. Yes, I would have to cut it to size.

I cut it to size all right...

An inch size smaller than I needed it to be! So I had to cut an extra inch off to add in there, and putty over the oops. Sigh... and I thought I'd measured carefully, too!

I also puttied in places where the various molding pieces didn't fit together snugly...

Then I attacked the central place where the fire would be. I'd batted around a number of different ideas for this, but eventually decided on a sort of trick-of-the-eye paint job...

You can see it a bit closer here. Using black and brown paints, I painted a "floor" and a "brick" back for our chimney...

It's amusing to me, given the wall is really just plain plaster and concrete.

Well, that went quite well, I thought-- So I admit, I wasn't quite prepared to face the problem with the five-foot mantel shelf. Here it is. It looks nice, doesn't it?

And yes, it looks very nice there on the floor. But up on the fire surround brackets, where it's supposed to live, that was a whole other story. The five feet, apparently, of this five-feet surround is at its very largest part-- the top! Meaning, the slope to the base of it is nowhere near five feet.

As it was in a box-- a bit larger than five feet was that box, I might add-- I didn't even imagine that the base would be way too small for my fireplace. It looked a bit like that old Chris Farley Saturday Night Live skit, "Fat Man in Tiny Coat."

And with the next mantel size up being six feet, I wouldn't have enough room on either side of the mantel to fit that! What was a girl to do?

Well, a girl was to wander around too many stores looking for an answer. And staring at planks of wood. And checking out standard shelving and finding they came in four feet max. And staring at more planks of wood.

Eventually, I came across the only solution that would work...

Stop staring at the planks of wood, buy one, and cut it to size.
So here we are. With a simple mantel shelf and everything else just about in place. I have a few small finishing touches to do, and then I'll show you all photos of the full room once things are back in their places.

Lessons learned from the project?

  • Always measure twice and don't cut wood when you're tired.
  • Mantels are sneaky and are not to be trusted.
  • Ibprophin can be an ambitious fireplace builder's best friend
  • You can accomplish anything if you put your mind to it! (Also if you start at planks of wood long enough.)

I wish you all the best on your next project, and thank you so much, folks, for joining me on mine.

This coming Wednesday, I have some interesting goodies to share with you from some Saturday adventures... Because, really, sometimes a girl needs to get away from the fireplace....

Badly.

Fireplace Fun: Part One

I believe I'd mentioned wanting to put a faux fireplace in the blue room I've been working on, on the place where many moons ago, there once really was a chimney breast. I wanted to keep it similar enough to the original fireplace that's in my diningroom downstairs, but make sure it coordinated more toward the blue and cream theme I was using.

Here was what that area of the room looked like without furniture in it...

Because I couldn't fit an architectural salvage wooden fire surround from Construction Junction into my car, I found I could get flat-pack pieces from Lowes and then construct it into place. This meant the baseboard on the chimney wall was going to have to be removed...
That was my project last Sunday, and I was relieved it was easier than I'd thought it would be. I also started using tile glue, to adhere the tiles I'd gotten for inside the wooden surround. I was trying to keep it along the same lines as the fireplace downstairs. That tile is a speckled pale green. I was lucky enough to track down a speckled light blue, also at Lowes...

And at $4 for a square foot, the cost was terrific. I looked into getting repro Victorian tiles, and at $10 for a single six-inch tile, I just couldn't afford it. The Lowes tiles have the same effect and were much more in my budget!

Here you can see the partially tiled wall, and the fire surround accessories I was noodling around with...
Now, time to make Tollhouse cookies...
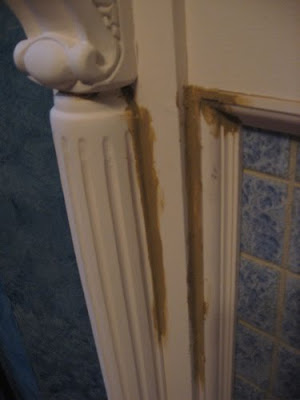
Or, um, grout the tile. The color of the grout is "vintage white." I liked it because it's not as stark, bright white as some...

Still looks like cookie dough, though. Or maybe I'm just really hungry.

Here's the fully-grouted wall!...

And now on to painting the fire surround and its wooden accessories...

This next part looks like nothing, but it ended up being the rough part. It involved getting the first bracket on the wall, to hook the wooden fire surround to...

Because underneath the wall plaster is the old brick chimney, I had to use a masonry drill bit, in order to drill the holes. This, of course, was not a part of the instructions of my fire surround kit, which assumed I'd be hooking it into drywall. So a consultation from a wonderful, helpful fellow at Home Depot earlier today, and a few of the right tools, set me straight.

And set the bracket straight, as well! I was so excited to have accomplished this, there was actually some dancing involved...
And three more brackets later... would you believe the fire surround actually fit?!

Another musical dance interlude! (Icould tell you I was kidding, but when it comes to home project success sometimes ya just gotta dance)...And before I quit for the day, I got the first two brackets on. These will support the mantle...

The mantle, and all of the fire surround accesories, however, will be for another day. I'm pretty happy with what I've gotten done in just a week, while only really tackling this after work and on the weekend.

So... the project continues! Wish me luck on the rest of it. I'll share with you what happens-- for good or bad!


If not, well, perhaps I'll see your smiling faces this Wednesday. I wish I could promise you all Tollhouse Cookies, but the best I can do right now is grout...

Not so tasty.