Fireplace Fun: Part Two

When last we left the Great Fireplace Installation of 2009, most of the wooden trim had been attached, and the fireplace was getting an extra coat of paint...

Little did I know the unexpected challenges I would face!

The first one, was the molding which went around the frame itself. Even though the fireplace frame was built to its largest size, the top molding that came with it for some reason was still many inches too large to fit. Yes, I would have to cut it to size.

I cut it to size all right...

An inch size smaller than I needed it to be! So I had to cut an extra inch off to add in there, and putty over the oops. Sigh... and I thought I'd measured carefully, too!

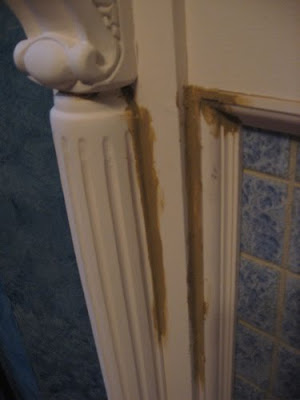
I also puttied in places where the various molding pieces didn't fit together snugly...
Then I attacked the central place where the fire would be. I'd batted around a number of different ideas for this, but eventually decided on a sort of trick-of-the-eye paint job...

You can see it a bit closer here. Using black and brown paints, I painted a "floor" and a "brick" back for our chimney...

It's amusing to me, given the wall is really just plain plaster and concrete.

Well, that went quite well, I thought-- So I admit, I wasn't quite prepared to face the problem with the five-foot mantel shelf. Here it is. It looks nice, doesn't it?

And yes, it looks very nice there on the floor. But up on the fire surround brackets, where it's supposed to live, that was a whole other story. The five feet, apparently, of this five-feet surround is at its very largest part-- the top! Meaning, the slope to the base of it is nowhere near five feet.

As it was in a box-- a bit larger than five feet was that box, I might add-- I didn't even imagine that the base would be way too small for my fireplace. It looked a bit like that old Chris Farley Saturday Night Live skit, "Fat Man in Tiny Coat."

And with the next mantel size up being six feet, I wouldn't have enough room on either side of the mantel to fit that! What was a girl to do?

Well, a girl was to wander around too many stores looking for an answer. And staring at planks of wood. And checking out standard shelving and finding they came in four feet max. And staring at more planks of wood.

Eventually, I came across the only solution that would work...

Stop staring at the planks of wood, buy one, and cut it to size.
So here we are. With a simple mantel shelf and everything else just about in place. I have a few small finishing touches to do, and then I'll show you all photos of the full room once things are back in their places.

Lessons learned from the project?

  • Always measure twice and don't cut wood when you're tired.
  • Mantels are sneaky and are not to be trusted.
  • Ibprophin can be an ambitious fireplace builder's best friend
  • You can accomplish anything if you put your mind to it! (Also if you start at planks of wood long enough.)

I wish you all the best on your next project, and thank you so much, folks, for joining me on mine.

This coming Wednesday, I have some interesting goodies to share with you from some Saturday adventures... Because, really, sometimes a girl needs to get away from the fireplace....

Badly.

Treasure Box Wednesday: Heavenly Finds

And a-one, and a-two, and everybody sing...

Er, no, better not. Let's just talk about our friend the conducting cherub here, and the other found items for this Treasure Box Wednesday.

The elaborate winged fellows are a lamp discovered at Construction Junction architectural salvage. This has already made it's way into my blue room. I would say it probably was the land-speed record for lamp placement in America.

How the lamp managed to survive in that store amid the big chunks of heavy marble mantles, thick wood planks, and masonry, I can't imagine. It does have some issues, certainly. A chipped wing here, a missing bit there...

And this fellow is completely sans-arm. But I think some clever patching will make it less obvious, and just add to the character. Too much was brilliantly intact for me to care very much...
Sometimes I think it's the imperfections in well-made old pieces like this that make them even more worth rescuing to me. Like I have to save them from further damage!

At the Salvation Army yesterday, there was absolutely nothing wrong with this pink hobnail vase...
I've seen this in white milkglass a bazillion times over the years-- in fact my mother had one-- but never, ever in pink! This was quite a surprise to me. I believe I recall it being an Anchor Hocking piece, but don't hold me to that.

I had also picked up this green Depression glass platter...

Funny, I'd been in line, saying to the friend I was shopping with how there were just a few small chips on the bottom, but how no one would see those. And the woman in front of me in line sniffed, "Well, I can tell you're not an antique dealer, then!"

Er, yes. I probably wouldn't expect people to buy from me something that had chips. But given it was for my own use? Well, you all know how I feel about that. Again, it's another pretty item whose beauty isn't ruined by the little flaws.

And my last second-hand venture of the weekend was attending a flea market at a local synagogue. It was set up almost identically to the church rummage sale I went to just a week or two ago. And there, I set my eyes on this great sandwich-glass and lightly-lustered amethyst dish...
(Here you can see an aerial view)...

And this excellent large, old mirror for a whole $2...

So it's been a pretty heavenly week for fun finds! And a nice respite from working on that fireplace.


It's going well, by the way. I installed the rest of the trim last night. It still needs a few coats of paint, and then I have some other touches to add. Oh-- and the mantle shelf. But the mantle shelf issue is one I'll share with you later. I think you'll laugh.

Take care, and I hope you'll pop back on Sunday for our next post!

Fireplace Fun: Part One

I believe I'd mentioned wanting to put a faux fireplace in the blue room I've been working on, on the place where many moons ago, there once really was a chimney breast. I wanted to keep it similar enough to the original fireplace that's in my diningroom downstairs, but make sure it coordinated more toward the blue and cream theme I was using.

Here was what that area of the room looked like without furniture in it...

Because I couldn't fit an architectural salvage wooden fire surround from Construction Junction into my car, I found I could get flat-pack pieces from Lowes and then construct it into place. This meant the baseboard on the chimney wall was going to have to be removed...
That was my project last Sunday, and I was relieved it was easier than I'd thought it would be. I also started using tile glue, to adhere the tiles I'd gotten for inside the wooden surround. I was trying to keep it along the same lines as the fireplace downstairs. That tile is a speckled pale green. I was lucky enough to track down a speckled light blue, also at Lowes...

And at $4 for a square foot, the cost was terrific. I looked into getting repro Victorian tiles, and at $10 for a single six-inch tile, I just couldn't afford it. The Lowes tiles have the same effect and were much more in my budget!

Here you can see the partially tiled wall, and the fire surround accessories I was noodling around with...
Now, time to make Tollhouse cookies...
Or, um, grout the tile. The color of the grout is "vintage white." I liked it because it's not as stark, bright white as some...

Still looks like cookie dough, though. Or maybe I'm just really hungry.

Here's the fully-grouted wall!...

And now on to painting the fire surround and its wooden accessories...

This next part looks like nothing, but it ended up being the rough part. It involved getting the first bracket on the wall, to hook the wooden fire surround to...

Because underneath the wall plaster is the old brick chimney, I had to use a masonry drill bit, in order to drill the holes. This, of course, was not a part of the instructions of my fire surround kit, which assumed I'd be hooking it into drywall. So a consultation from a wonderful, helpful fellow at Home Depot earlier today, and a few of the right tools, set me straight.

And set the bracket straight, as well! I was so excited to have accomplished this, there was actually some dancing involved...
And three more brackets later... would you believe the fire surround actually fit?!

Another musical dance interlude! (Icould tell you I was kidding, but when it comes to home project success sometimes ya just gotta dance)...And before I quit for the day, I got the first two brackets on. These will support the mantle...

The mantle, and all of the fire surround accesories, however, will be for another day. I'm pretty happy with what I've gotten done in just a week, while only really tackling this after work and on the weekend.

So... the project continues! Wish me luck on the rest of it. I'll share with you what happens-- for good or bad!


If not, well, perhaps I'll see your smiling faces this Wednesday. I wish I could promise you all Tollhouse Cookies, but the best I can do right now is grout...

Not so tasty.