Showing posts with label trash to treasure. Show all posts

Extreme Makeover: Desk Chair Edition

Sometimes things just have too much potential to be thrown away. This 60s desk chair from my friend Scoobie's workplace was about to hit the trashbin....

With its ripped avocado green vinyl seat and a cushion that had broken down over time, her employers were prepared to replace it with a new high-tech number.

Scoobie, however, saw makeover potential and conferred with a consultant.

Or, well, me.

Her total investment was in discount remnant fabric from JoAnn's, a new cushion purchased with a half-off coupon, and some paint and topcoat from Michaels-- also half-off.

Here's Scoobie removing the chair back...

And here's the much-used cushion set which will get reupholstered by the, er, consultant.


To soften the silver-steel look of the chair, Scoobie gave the chair frame a number of coats of a light bronze paint...


After that, she hit it with a few coats of clear topcoat.

Then I went into action. All I used was a pair of shears and my handy-dandy staple gun. I hadn't upholstered a chair with a cushioned back before, so this was a bit new for me. Usually they were standard hard-backed dining chairs.

The key to this particular project was in trying to make sure the stripes were not only evenly distributed on bottom cushion and top cushion, but that they were relatively aligned between the top and bottom cushions themselves.

In retrospect, it could be a little straighter, but considering this was the first time I'd attempted it, I'm pretty happy. I think it's not overly off.

For the bottom cushion, it's a simple case of cutting to fit, and working your way around the seat, ensuring the fabric is pulled taut and each side has at least one staple in it, holding everything in place. Then fill in the rest of the staples, leaving room for the chair screw holes.

For the top cushion, the fabric went over the front, then folded from the bottom over the back. So basically I was working on two sides at once.

And soon.... here we had the finished chair!


Here's a little closer view...

Quite a difference, eh?


Just goes to show, one employer's trash really can become another office jockey's heirloom posh bum-rester. :)

Now before we go today, I wanted to just take a moment to thank you all for reading the Thrift Shop Romantic. This last Friday marked the third bloggiversary of this little place on the Internet. Three whole years have gone by-- can you believe it? In the world of blogging, that means TSR is no spring chicken!

But it couldn't have been done without you all. Over the years, I've appreciated your interest, your notes, your comments, your questions and overall, your kindness.

So I think we have much to celebrate! Have yourself a piece of virtual cake and some sherbet punch and party on, friends!

I hope to see you again Wednesday!

Treasures from Throwaways, Part Two: The Do-able Ideas Marge Missed


Last week our maniacal, made-up crafter "Marge" went on a complete trash-to-treasure redecorating binge based on a 1976 Better Homes and Gardens book called Treasures from Throwaways. For folks who weren't sure this book wasn't as fictional as our friend Marge, I've included a real-and-for-true cover scan here as evidence. You can call it "Exhibit A."


But today, I'm afraid Marge won't be joining us. (Yes, I feel that sigh of relief myself!) And why? Because I thought we'd talk about some of the more positively inspiring projects from this book-- ideas that you might be able to use and adapt for your own trash-to-treasure projects... and not make your friends and family worry much about your sanity!

What I liked in particular about the projects featured here today is how the "trash" items they use actually seem to transform beyond their mere individual components, into interesting, useful or artistic pieces on their own.

Like these "Striking Candlesticks"...

These exotic metal candleholders are made of tuna cans, juice cans, gelatin molds, tab top rings from old soda cans, chair glides, drain pipe, beads, a steel rod, nuts, bolts and wire.

When I saw these, it occurred to me that folks who enjoy making garden totems would recognize that these candlesticks are done much on the same general principle. Just some ideas for a different sort of treatment of the same concept. And fire-resistant, too!

Next, we have an unusual way to spruce up a plain table using imported olive oil cans...


Not only does a plain old table get a new lease on life, but you get a fairly durable, flat surface to put beverages on, reasonably resistant to moisture. The design becomes solely up to you, depending on what Olive Oil brands and packaging you choose.

Next we have a project that looks time-consuming, but I thought was quite unique. Can you guess what the delicate doll furniture below is made of?


Need a hint? The secret is tin cans, fabric scraps, cotton and enamel paint!...


Tiny dressing tables, chairs, beds and more, all seem possible through some clever, careful snips of the can!

Now this next piece is a bit unusual, but I could see this working in some variation as inexpensive wall art for a very modern kitchen...


The book calls this the "Utensil Safari Wall Mount." But it sort of reminds me of a "Kitchenalia Death Star." Even so, interesting utensils in varying sizes and shapes are mounted onto a backing board and all sprayed a unifying color. The effect offers variety, and is certainly unique.

And last, I wanted to show you three different ways to create fun chess sets from unexpected items. Any idea what these painted wooden chess pieces are made of?...

This particular set is put together from Tinkertoys! Wheels, spools, cyllinders and beads combine to make easily identifiable Kings, Queens, Rooks, Bishops and Pawns.

Another chess set calls for empty thread spools in varying sizes. These have been painted up in checks and harlequin patterns in navy and white, and red and blue...


And this one below is my absolute favorite-- largely because this set has look that is somehow both modern and vintage at the same time... What to do with those old TV tubes?

Here's a closer look...


The tubes sit on bases made of 1/4 inch clear plastic, to retain the translucent, high-tech feel.

Well, I hope the projects featured today might spawn some ideas for you clever t-to-t'ers out there.


I hope these Dog Days of Summer are finding you happy, well, and able to do the things you enjoy most.

Finding Vintage Romance in Today's Independent Art


Folks well-familiar with this blog know I'm a big fan of art. Whether it's framed prints from the 30s in the Maxfield Parrish style, thrift store paintings where good intentions may outweigh skill, or talented artists and photographers working today to express themselves creatively. In fact, I fear my love of art is rapidly starting to exceed my wall space!

Like decorating, taste in art is incredibly subjective, of course. One man's prized collection can easily be another man's creative nightmare. But I thought you all might like to see just a few of the artists and photographers working today whose creative ideas I respect and enjoy. For a lover of things vintage and Victorian, I feel they echo that sense of romance, adventure, mystery and story-telling.

I just thought it might be fun to give them some props today!

Like British artist, Michael Thomas here...


He's a book jacket illustrator out of England and his work becomes cover art, notecards and prints. I have three of his original paintings, and have been absolutely wowed by his skill, as well as how effectively he has embraced the Pre-Raphaelite style for his subject matter and composition. His works are largely acryllic on board. The piece here is Rapunzel, and as I understand it, she is intended to be used in cards and as an illustration within a fairy tale edition.


This one below is called Pices...

I'm not actually a Pices, but I loved the delicate figure and her almost Rosetti-styled face.

The last of his works which I own is what he refers to as his Art Nouveau angel...

This, the artist indicated, was one of the more decorative pieces he'd done. The elaborate background detailing does remind me of some Burne-Jones pieces, while the figure complements the Pices painting well. I have these on either side of my Victorian pocket doors.

You can check out more of Michael Thomas' work-- I believe he currently has prints available of Pices and the art nouveau angel-- in his Ebay store Fresco Art by clicking here.

Another artist currently doing work which reflects his love of Pre-Raphaelite art is American artist Patrick Lynch out of Kentucky.


I met Patrick online a few years ago due to a mutual appreciation of the Pre-Raphaelites. Patrick balances his art career along with a full-time job-- no easy task-- but has been passionate about his painting for decades. His work uses paint as well as colored pencils to create the vivid shades you see above-- a feat made more remarkable as the artist works to find the right balance in spite of being color-blind.

His paintings typically incorporate Victorian or medieval-Gothic styled ladies with wistful expressions. Imagery tends to emphasize his love of the gramophone, river scenes, and statuary. The painting below is one of my personal favorites in Patrick's online gallery. It's called First Night of Autumn. The hats are based on the work of one of his friends, a Kentucky hat designer.

You can check out more of Patrick's work at his site The Lost and Beautiful Past.

My most recent art purchase was from a shop at Etsy, called Audrey Eclectic. Artist Heather Van Winkle uses the "whimsy folk art" style to create pretty, quirky portraits with a gentle storybook feel. Using mixed media collage, large eyed lasses stare demurely at the viewer, infused with layered details that sneak up a bit of the viewer the more he or she looks. What I appreciated in particular was her work involves more than pretty images of old-fashioned girls, but little tales to support each one.


This is "Elerey," a "Hallowed Hall girl"-- one of three sister portraits, each with a fun little history to accompany her. You can read about them on Heather's blog. Elerey was a toy maker-- and her creations tended to demonstrate some very mysterious and unusual behavior! I liked her Wednesday Addams style.

Another interesting feature is, Heather's work is done on scrap wood, cleaned up and repurposed. Talk about your trash to treasure!

In terms of less Gothic, more Shabby Chic art, I also became taken with an artist named Carole DeWald. She sells on Ebay, in her shop Carole's Cottage, and does still life floral work which puts a particular emphasis on roses, hydrangeas and lilacs. This particular painting is in my dining room.


Another Ebay artist of the genre is Mary Ann Mayer. Her lilac painting-- with its impressionist feel-- made an impression on me. I love that it looks like it has some real age to it.


While we were discussing artists, I'd also wanted to draw your attention to two photographers that capture the natural world in remarkable ways. It's patience and perseverance that make their work so awe-inspiring-- waiting for that perfect glow of a sunset, capturing the right angle of a Western mesa, or sitting in a boat on a Norwegian lake for the just-right shot of the Aurora Borealis.

If you're a fan of nature photography, I think you'll really enjoy the work here.

Rodney Lough is an American photographer whose work my friend Scoobie is addicted to. His love of nature shines through with every photograph, and honestly, once you've seen Rodney's treatment of a particular area, it never seems the same again. He makes our world truly magical. Check out his site, TheLoughRoad, and I believe you'll see what I mean.

Photographer Thomas Laupstad is a fellow I met online through blogging, and like Rodney Lough, he captures his own country-- Norway-- with a keen eye, a love of color and a lot of waiting around for the perfect moment. You can see Thomas' work on his blog here.

Well, I hope you all enjoyed this little dip into the world of independent art today. I know there are a lot of talented people out there, but I thought it would be nice to discuss just a few whose work has become a part of my life.

  • If you missed Treasure Box Wednesday, where the mantle gets a new look, I get a few thrifted goodies and you all get some vintage tunes, click here.
  • If you missed last Sunday's post on Giggles over Wiggling, Jiggling Jell-O recipes, click here.

And I hope to see you again soon! Thanks for your visit.

Crafting the Marshmallow PEEPS Carousel

Some people see sugary marshmallow chicks and think, "Look, dessert!" Me, I'm the sicko who thinks, "Hm, what I can glue them to?"

Actually, I'd been wanting to try my hand at making a cardboard Christmas village house, ever since I got my hands on some vintage-style cottages for the winter holidays. But when I realized there were extra Marshmallow Peeps lurking from last Easter's Peep Garland project just going to waste (er... curing) (click here if you'd missed that), ... well, the project took a suddenly Peeposterous turn.


"Why not build a cardboard carousel?" my brain mused. "In Easter colors! With Peeps Chicks instead of horses! And marshmallow rabbit onlookers?!"

(Yes, total suspension of disbelief is one of the primary rules for effective Peep crafting.)

The first step was to get the cardboard. This all involved stuff I would have thrown out otherwise-- the backs of used writing tablets, paper towel rolls, and parts of old boxes.


For the base, I made a pattern in Microsoft Word out of boxes-- a large square which would be the platform, surrounded by narrow rectangles of equal size all around it, to bend down and give the platform dimension. I printed this out as my template, and traced it onto the cardboard. I made four of those, cutting a circle in the center of two of them, that would allow the paper towel roll to fit through snugly.

I painted and glittered each of these pieces separately, so that way the paint job would be a little more pristine-- especially since I'd wanted to use a lot of different colors. The paints were Folk Art acrylics, and the glitter was Martha Stewart brand from Michaels. I used Martha's glitter glue, too.


Here's a close-up of the tube, so you can see the carousel "mural." I'd glued and painted four egg-shaped "windows" onto the carousel center featuring roughly-painted Peeps scenes... Mainly because it made me laugh...


Next, I made the roof. This was rough, given I'm apparently dimensionally-impaired. And it actually took me several tries to figure out how to make flat cardboard fold into a four-sized peaked roof. You can see the pattern of the four triangles laid out here...


When I made the roof the first time, it was huge. Really, really big. Like, one big wind in Peepville would blow the whole carousel over and cause major lawsuits. So I had to make it about half the size I originally did. You can see the giant pyramid here...


Next I poked four holes into the top and bottom base boxes using a Phillips head screwdriver, and skewered one Peep each through a plastic drinking straw. (Got a whole pack for $1 in Easter colors at CVS.) Then I fitted each Peep-on-a-stick into place, and put a bit of craft glue around both the paper towel roll in the center (top and bottom) and around the end of each straw. Then I glued the top and bottom boxes onto the piece. I also glued the more modest-sized roof to the top roof box, and glued and glittered those together to be more seamless.

The pink trim was simply strips of box carboard peeled apart from each other to create that ribbed look, and then trimmed on the top with pinking shears. These were painted, glittered and cut to fit.


Each Peep was moved into carousel position by using a cotter pin to hold it in place while a dollop of glue dried to affix it permanently.


Lastly the carousel was affixed onto its "grass" glitter platform. That base is just some cardboard that came with a calendar, and glued onto a heavier box cardboard for more stability. It was painted, glittered, and the carousel was stuck to it...


A blue and a pink bunny Peep were added to the scene, waiting in line for the ride. (Why, may I ask, are the marshmallow rabbits called "Peeps," too? Ah, just one of the mysteries of life...)

Things I'd do differently if I did this again? I would make the entire piece rounded instead of square. Also, I really don't feel the structure would pass Peepville building codes; edges aren't as flush as I'd like, things don't sit quite as flat as I'd hoped, so I'd be more meticulous about how I cut my patterns.

All in all, though, it's a funny display for the house, and a great way for a little trash-t0-treasure fun at the Easter holiday. Hope you had fun during this magical moment of Peep entertainment!

For those of you who missed the post on my thrift-store-decorated work office, click here. Otherwise I hope you see you for this next Treasure Box Wednesday, when we uncover some orphaned saucers, some springy plates for $1 and I become reacquainted with a bowl like my mother's which I'd thought was lost to the sands o' time.

Thanks, as always, for being a part of it all! I just love that you folks stop by!

Accidental Rose and the Sculpey Improv

It started out as a simple challenge. “Let’s all do something with a tin ceiling tile and see what we create,” suggested one of the ladies on the HGTV Trash-to-Treasure forum.

And with a tin tile just sitting around in the basement, waiting for inspiration, I’d said, “Why not?”

I’d bought this tile for a couple of bucks at Construction Junction, and thought someday I’d be ready to paint roses on it. I had grand visions of creating this soft, dewy-looking bloom on architectural salvage... An homage to Shabby Chic I could be proud of... A shining testament to nature’s beauty...

I should have waited longer.

You see, no amount of inspiration, peer pressure, or wishful thinking will teach me to paint decent roses on cue.

Accidental roses? Roses that somehow end up looking reasonably rose-esque through no knowledge or understanding of my own? Sure! A one in five chance!

But when the pressure’s on, and I get to painting, my roses will only look like roses to a half-blind abstract art admirer...

One wearing, I might add, SERIOUS rose-colored sunglasses.

I was reminded of this not long into my tile project.


So I sat in my favorite chair in the livingroom, staring miserably down at the blotch on my tile wondering just how I could salvage this... er... salvage.

I could try to remove the rosely blob with a bit of water and a Q-tip. (It was gouache, after all)...

I could paint over the whole tile and start again-- losing that nice old tile patina...

Or I could pretend it never happened by sticking Sculpey to it.

You know by now where I’m going with this.

I admit, while I was rolling red and pink Sculpey around in my hands, I had a moment not totally unlike when I was varnishing Marshmallow Peeps for my Easter garland project. It was one of those brief moments of reflection where I questioned why any sane person would think there was even a POSSIBILITY that this was a good idea.

Ah, good times, these reflective thoughts. I nod at them. Give ‘em a smile and a “Hey, thanks for stopping by!” Then wait for them to pass, so I can really get something done.

It’s times like these, I also feel a little sorry for my housemate. She is, after all, just trying to carry on with her everyday life. To have a decent place to live, as she saves for a home of her own. Or just wants, say, a soda.

Yet every few months or so, she comes downstairs to find me threading Marshmallows and beads. Or gluing flatware to necklace wire. Or spies me completely red-handed from polymer clay.

She no longer asks what it is I’m doing and why, which should probably concern me. She just raises an eyebrow, gives a smirk, and continues on into the kitchen.

I can’t blame her, really. This last week I was lining a cookie sheet so I could bake plastic.

Only crafters fail to see the full surreality of these things as they happen.

Having baked the buds, I began to noodle around with it on the tin ceiling tile. The blue, somehow, looked a little TOO blue. The rose, rightfully, looked a little too plasticine.

So I gave it all a light coating of some white pearl paint.

There’s really nowhere else to go from here.


Yes, I look at the thing and think, oh, how far one ends up from the original idea sometimes. It says a lot about the pros and cons of creativity when a Shabby Chic-inspired rose painting on architectural salvage can somehow mutate into a three-dimensional art installation with plastic petals and pearl paint. And to tell the truth, I STILL don’t know whether I even like the thing or not.

Only thing I can guarantee is, no one else in the tin tile challenge will have anything like it. So, if only for a laugh, I have to believe my time was well-spent.

Hope you’ll come back next week as we celebrate The Thrift Shop Romantic’s first bloggy birthday! Have a wonderful week!

Tales from Curbside Shoppers

Until recently, I never really thought of my projects as being “trash-to-treasure.”

Fact is, I have a great respect for “stuff” in general. (You cannot be a bit of a Victorian without “stuff.”) So the unleashing hidden potential in a chair or table...or finding a use for something no one else wanted... was pretty much the only way to HAVE anything decent. For me, it wasn’t part of any special trend, or movement. It was the decorating budget.

To be perfectly honest, I hadn’t even been aware trash-to-treasure had a name-- and if anything, I’d considered it something better left undiscussed. Because it seemed-- in a fairly consumptive society where the newest video game system turns the old into rubbish the moment the marketing starts-- well, mentioning to a visitor that CHAIR they were sitting on had, last week, been resting on the side of the road with about three filled Hefty bags-- it really wasn’t the mark of good hostessing.

But then I learned I not only wasn’t alone, but we have not one name, but many. We’re “curbside shoppers.” We’re “dumpster divers.” We’re “trash-to-treasure artists.” In the UK, they tell me, we’re “skip robbers” (I rather like the adventurous sound of that! Has a good ‘Italian Job’ feel to it). And according to the hostess over at the Netherlands-based Trashcollector.blogspot.com, Dutch garbage men call us “Morgensterns” or “Morning Stars.”

I think that’s my new favorite. Gotta love the positive spin on that one!

But the most interesting thing I’m learning about the trash-to-treasure phenomenon is these skip-robbers, these Morning Stars I’ve had the pleasure of meeting online, tend to be the most amazing, funny and creative people. People who really appreciate the value in an object. Who really understand what it is they have. And who, often, have a terrific sense of humor about the fact their hobby might not be embraced as warmly by the rest of the world. So today, I give you two reader trash-to-treasure stories, and a new tale of my own which I’ve discussed with a few of you personally, but thought I’d recount here today.

From Rhonda L. who was kind enough to let me publish her great story to share with you all:
-------

“I was so excited to find, a couple of weeks ago, an entire Waterfall Bedroom Suite in the trash. My teenage daughter and four-year-old daughter share a bedroom. We had just cheap cardboard furniture in their room until a year ago. A friend of mine had a waterfall wardrobe that her boyfriend was going to use as firewood. Well, I saved that beautiful piece of furniture, and the same day I ran by my favorite antique mall and found matching twin beds (and on sale).

“Well, they really needed more dresser space (with girls having so many clothes). So I had been keeping an eye out for a great deal on another wardrobe or dresser. My oldest daughter has been wanting an vanity for her room, since everyone is always fighting over the bathroom. Well, I work the 2nd shift and was on my way home when there it was.... A beautiful vanity with this enormous and even more gorgeous mirror. I had a hard time getting the vanity in the car so I went home got my daughter and we somehow fit it in the back seat of my car...”

“The next morning I got my mother-in-law (from whom I learned the hunting free-stuff trade) came before the trash truck and we were able to save the wardrobe and the full-size head- and foot-boards. Which she was able to use for her bedroom and it went with her bedroom suite. (She promises me that I can have it back when I have the space.)..”

“The girls love that vanity and think they are princess now.”

-------
I LOVE that the daughters don’t care one bit that the furniture came from the curb. I think those frugal little princesses have a fine future ahead of them!

And now from writer Molly Crane (And Molly, I’d tried to link to your web site, but I see it’s down. If you read this, please email me if it’s moved to a new location and I’ll add the link...I’ve been kind of concerned...)

Molly titles her story “Rich Man’s Trash”:

------
“A few weeks ago I was awakened by my friend at 6 a.m. Saturday morning! She said to me, ‘Let’s go treasure hunting!’... “

“I said to her: ‘Girl, what are you talking about?’...

“She proceeded to tell me she needed some ‘new’ things for her recently-purchased Atlanta condo and she was going ‘dumpster diving.’ Immediately I thought the girl had had too many drinks the night before!...

“’How can you get 'new' stuff from dumpster diving?’ I asked her...

“She told me to wait and see! So we headed out around 6:30 that morning. We went to several, and I mean SEVERAL, affluent Atlanta suburbs: Buckhead, Alpharetta, and SmokeRise alike...

“We filled the truck with beautiful rich man's trash. We stopped at this one house where the owners had tossed this heavy SHINY mahogany table. Why? Because it had a huge ugly scratch going down the middle of it! We acquired that and paid a refinisher $50.00 to refinish it. We had it appraised and it was worth over $1,500.00 before it was scratched, but was still worth only a mere $750.00 now...

“Wow! Unbelievable.

“I picked up some tarnished stainless steel serving spoons and a tarnished serving platter as well. The next time I have a nice social gathering, I will definitely break out the Rich Man's Trash that I found and ‘repurchased’ for free!...

“Now I know where I am going to do my shopping from now on. “

-----
Thanks again, Molly, for taking the time to tell us your story!

And MY tale? My tale is a lesson in better planning.

On bulk trash day in my neighborhood, I was headed to work a bit early. Dressed in business attire in plans for a later meeting, I lost all of my professionalism the moment I saw the white chairback peeping out of the trash of a neighbor about a block down the road from me.

I looked in the rear-view-- no one behind me-- threw the car into park and leapt out.

Er, NO, actually I threw the car into park, still running, and... um, you know how cars have automatic child safety locks?

Yes, that’s right-- I couldn’t get OUT.

So I fumbled with the locks, and then realized I was also BUCKLED in, and THEN leapt out of the car....

So much for the sophistication of ‘The Italian Job.’

I seized the chair and running back to my car, realized my second logistical error. The remote for the trunk and the back doors was on the keychain with the car key on it. Which was in the ignition.

(Growl, grumble...)

So there I was, in nice work clothes, my hair done up, and wearing vintage jewelry, trying to cram this dirty trashed chair into the back from over the driver’s seat. Quickly.

I have no idea if my neighbors spotted me, but my triumph over the chair has been enough to soothe some of those concerns.

I’ve been told recently, by some of my fellow rubbish fans, that I need no fear when I do these capers-- that if people don’t like it, it’s just too bad...

Others have suggested I employ disguises.

And while I appreciate the well-meaning advice, somehow, I think seeing a gal with bright red hair and, say, a Groucho Marx nose and glasses come flying out of the car, grabbing furniture and zooming away, isn’t necessarily going to be LESS memorable, in terms of techniques.

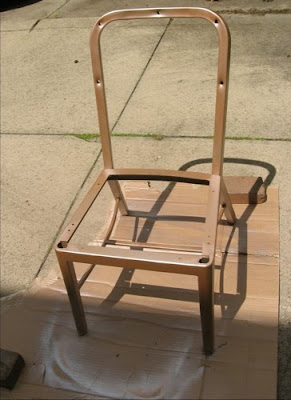
I figure if anyone questions it, I’ll simply invite them to see my finished chairs. This last chair is still waiting for its new look. So for a while at least, its story continues.

Have a wonderful week, everyone! Next week, join me for the results of a recent outdoor cottage decorating swap!