The projects your blog hostess has been working on lately have actually been more in lending a hand to my buddy Scoobie than anything pressing of my own. Her place is under full-on decorating attack. It started with updating the kitchen I showed you a week or so ago, and now it's been adding some arts-and-crafts style furniture.
This is where that extra hand has come in: unwieldy pieces of lovely wooden assemble-it-yourself furniture which assumes you not only have that hand to spare, but an extra couple of feet, a six-foot stature and possibly a mechanically inclined hunk at your disposal.
 At the moment, there's just me.
(Disappointing, all around, I know. :) )
But so far, we're managing. Once you put together one flat-pack assemble-it-yourself piece, you begin to figure out how those tech writers think when they come up with the instructions...
You start to get inside their heads....
You begin to take for granted all the things that are not implicitly stated as steps toward finished furniture. Like just because they SAY to do a certain thing, doesn't mean they really, really, really mean to do it right then. Or just because they don't say to do it, doesn't mean it doesn't need to be done.
Their heads are a scary place to live sometimes. I know, I used to be a tech writer myself.
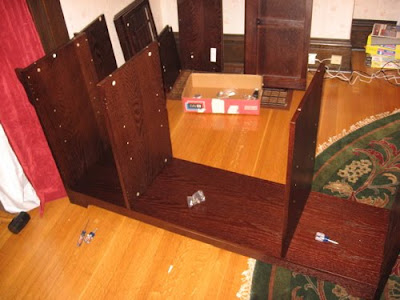
 Anyway, you can see Scoobie's completed sideboard here. She's still arranging the decorative goodies on it, but this is an early draft sample of what it might look like.Note, those peach curtains are on their way OUT. While nice, and while matching the wallpaper circa 1990, they were left for her from the previous owners. Scoobie plans to remove the wallpaper and paint the walls a nice lights arts-and-crafts green, to tie in her red-and-green William Morris rug.
Here is a display cabinet she assembled all by herself, no hand or hunk-to-spare involved.
 And this is the barrister bookcase we assembled last weekend. It took a few hours, and then we both took some Advil. But it looks pretty sharp!
 I'll be excited to see how her office will take shape. And when it does, with Scoobie's kind permission, I'll share it with you all, too.
So everybody sing: "Cam bolt's connected to the... locked cam! The locked cam's inserted into... Side B! Side B's connected to the... Top A! Top A's connected to the... Wood peg...."