Showing posts with label arts and crafts period. Show all posts

Delightful, De-wallpapered and Decorated

I mentioned a couple of weeks back that I would be lending a hand to my friend Scoobie to remove wallpaper from her livingroom and diningroom. Regular readers may remember that Scoobie's the one who is writing a Western and loves the look of the Arts and Crafts period mixed with Western kistch.

Well, the wallpaper she had (and still has in the diningroom) was a bit twee for her tastes-- ovals of peach flowers with aqua stems. All very late 80s, early 90s...
You can see in this rather blurry (sorry!) photo what the room looked like before we started work on removing the paper...
And here, the wallpaper is going buh-bye...It didn't just peel off, but with a little soapy water, it was a lot easier to scrape away.
She and I spent two days of a weekend working on it, and then Scoobie finished it up herself in evenings during the week. Then it got painted a soft, robin's egg blue, which really makes her brown accessories pop!

The color was actually chosen to match the sky in the painting she already had over the mantle. She's already settled a lot of her thrifted and antique malled goodies into place there...
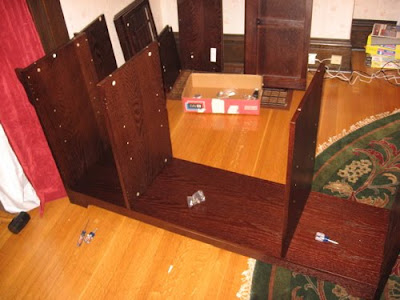
An arts and crafts cabinet helps hold other beloved treasures, while her resident cowboy and horse (courtesy of TJ Maxx) wait for their next round-up.

The arts and crafts lamps look just right against the inviting blue walls...
And she's found a place for some of those kitschy Western themed bourbon bottles she's found at flea markets and thrift stores over the years...
Thanks to Scoobie for letting me share photos of her home with you today! I guess her dining room will be the next decorative undertaking-- helping to liberate it from a garden of different large peach flowers, and peach draperies.

Take care, folks. Until next post!

Arts-and-Crafts, and Cams and Cambolts

The projects your blog hostess has been working on lately have actually been more in lending a hand to my buddy Scoobie than anything pressing of my own. Her place is under full-on decorating attack. It started with updating the kitchen I showed you a week or so ago, and now it's been adding some arts-and-crafts style furniture.

This is where that extra hand has come in: unwieldy pieces of lovely wooden assemble-it-yourself furniture which assumes you not only have that hand to spare, but an extra couple of feet, a six-foot stature and possibly a mechanically inclined hunk at your disposal.
At the moment, there's just me.

(Disappointing, all around, I know. :) )

But so far, we're managing. Once you put together one flat-pack assemble-it-yourself piece, you begin to figure out how those tech writers think when they come up with the instructions...

You start to get inside their heads....

You begin to take for granted all the things that are not implicitly stated as steps toward finished furniture. Like just because they SAY to do a certain thing, doesn't mean they really, really, really mean to do it right then. Or just because they don't say to do it, doesn't mean it doesn't need to be done.

Their heads are a scary place to live sometimes. I know, I used to be a tech writer myself.
Anyway, you can see Scoobie's completed sideboard here. She's still arranging the decorative goodies on it, but this is an early draft sample of what it might look like.
Note, those peach curtains are on their way OUT. While nice, and while matching the wallpaper circa 1990, they were left for her from the previous owners. Scoobie plans to remove the wallpaper and paint the walls a nice lights arts-and-crafts green, to tie in her red-and-green William Morris rug.

Here is a display cabinet she assembled all by herself, no hand or hunk-to-spare involved.
And this is the barrister bookcase we assembled last weekend. It took a few hours, and then we both took some Advil. But it looks pretty sharp!
I'll be excited to see how her office will take shape. And when it does, with Scoobie's kind permission, I'll share it with you all, too.

So everybody sing: "Cam bolt's connected to the... locked cam! The locked cam's inserted into... Side B! Side B's connected to the... Top A! Top A's connected to the... Wood peg...."

Bewitchin' Kitchen Updates

My friend Scoobie's been working hard on redoing her kitchen, and I thought you folks might enjoy seeing some of the still-in-progress transformation.

For long-time readers, you might remember, she's the friend who bought a house last year and has been decorating it in a Western arts-and-crafts style. She's also my co-conspirator in Fiesta dishware obsession, though where I lean toward pastels, she favors the Tangerines, Evergreens and Browns.

When it started, her kitchen was kinda... dull... and not at all Western. The previous owners had gone with a moden coffee-themed wallpaper, that was somehow simultaneously not very interesting and also strangely busy-looking.

You can see some of the wallpaper here-- lots of little coffee cans-- and the thing was topped with a Very Coffee Wallborder.

Fine, I'm sure, in its time, but not really what Scoobie was going for...

So the more she looked at it, the more Scoobie decided the wallpaper had to go. She and her younger brother spent a week removing paper...

And then painting. Based on her dinner plates, which feature orange Western mesas and green cactii, my friend chose her color scheme. The orange paint (it's called "Indian Paintbrush" and it looks quite a bit brighter here than it does in natural light), is the same shade as her Tangerine Fiestaware dishes.

(Which you can see happily nestled on her green baker's rack.)

The piece of furniture below-- part pie-safe, part hutch, or as Scoobie gleefully refers to it, "the Putch"-- was designed and built by her dad specifically for this space...

It's pretty, simple, and incredibly functional. All canned goods and soda bottles become nestled away!

I noticed she's using the orange and green arts-and-crafts style breadbox I'd found for her at the Red, White and Blue Thrift Store in Bellevue a few months ago...
And even the apples of the season have a good home here in her happy Fiesta bowls!
Going forward, she wants to add some plate rails to display some green-and-orange Victorian pottery dishes with deer, pheasants and other game transferred on them.

She also would like to display her tin enamelware kitchenalia. This should help tone down the orange a bit.

As I said, it's a work in progress, but so far nobody misses those wallpaper coffee cups. If she's up for it, I'll share pictures with you all in the future as more things come together.

And so comes together the end of today's post! I hope to see you Wednesday to talk secondhand treasures. Take care, folks!

Treasure Box Wednesday: the Alice in Wonderland Kitchen

Given this particular Treasure Box Wednesday, I have nothing newly-thrifted to share with you all, I thought I would instead show you a room I hadn't really taken pictures of before.

Many of you folks were "with" me as I spent time creating my "Alice in Wonderland"-inspired faux stained glass window. (Thank you for your patience over that lengthy process!) But I never got a chance to show the big picture, and just why this particular theme had taken over my land of cookery.

It was the joy of finding Fiestaware, and integrating that into my otherwise Victorian house that left me trying to blend the streamlined art deco style of the dishes with the William Morris, Arts & Crafts red and green livingroom that the kitchen opens onto.

And one day I got looking at my collection of bright Fiesta candleholders and vases here...

...Thinking, "These Fiesta folks are completely mad! Look at those crazy shapes!"

And that's when something in my brain said, "Hmmmmmm...."

I already had a strange number of pottery hearts hanging around...
And then at Tuesday Morning, I uncovered purely on accident some odd-and-assorted plates, bowls and cups from a British-designed Alice in Wonderland dinner set. Each one had a quote from the book-- and being a writer and a huge fan of the tale since childhood, that was just too much for me to resist!

The timing was right!

Fiesta, it turns out, also made some heart-shaped dishes, a number of which I found in their outlet discount area.


Add to this things like a Humpty Dumpty teapot I had thrifted long ago and put into action now...

And a McCoy rabbit pottery pitcher, well... the whimsical theme has worked surprisingly well without being impractical for kitchen use.
The colors transition nicely from one room to another now, even though the kitchen is a lot more kaleidoscopic than the rest of the house. The pops of red, and an Arts & Crafts rug, really tie it together.

I also had fun with a little, er, prop...Anyway, that's the Treasure Box for this week. Hope the rest of your week is filled with wonders!

Making the Faux Stained Glass Window -or- The Days of Hearts and Roses

Sometimes success lies less in the final destination, and more in the journey to get there. I think I can safely say this faux stained glass window project is a good example of the voyage being more prized than the ultimate arrival.

As readers of my earlier post might remember, I was hoping to create an inexpensive "stained glass look" window to hang in my kitchen and go along with my kaleidoscope of Fiesta dishes.

I was aiming for a sort of Arts & Crafts Period meets Alice in Wonderland feel. This was my initial design....
Using an old window I got at Construction Junction for $1.06, I added the pattern in stick-on leading I'd picked up discounted at Michaels a while ago...
The pattern progressed (if a little bit crooked here and there, but hey, it's Wonderland, it's allowed to be wonky)....
And finally, it was all transferred. Not perfect, but you can see where I was going with it, anyway.Now it came to filling it in. I used a couple of different types of glass paint, including Gallery Glass brand, made specifically for these sorts of windows. Unfortunately, the directions on how to go about it indicated "Follow the directions on the pattern." Y'know, the pattern I didn't have because I made my own pattern.

So initially, I was painting the color on with brushes. And that made things really streaky. In fact, you can't see just how streaky it was in this photo...
But here in the light-- yipes!
I liked how fluid the roses and hearts turned out, but that was a different type of glass paint, and that brand didn't come in the colors I needed. So I decided to try sallying forth by squeezing the paint on thickly-- as I did the hearts, the background paint, too.

I was a little like icing a very large, very cheerfully-colored, but very untasty cake...
And as it dried, the paint began to change color rather dramatically. I found myself just a bit mesmerized by the way it crept across the window from block to block getting darker... darker....
So now it hangs in my kitchen. I think it still could dry a little more-- it tends to smooth out slightly the more it's dry...
But the whole thing does have a rather textured appearance I hadn't planned on, anyway. Better than streaky, but not quite as placid and smooth as I'd hoped...
Still, it catches the light nicely...

I think in terms of Lessons Learned, I would experiment a little more with different types of glass paint, and understand their surprising behaviors, before embarking on a full-fledged project like this.

Anyway, I enjoyed the process. Honestly, what's nicer than a quiet weekend afternoon listening to a favorite film and surrounded by a whole rainbow of craftable colors?

May the rest of your week be shiny, too!